7 Common Plant Care Mistakes (And How to Fix Them) – A Beginner’s Guide
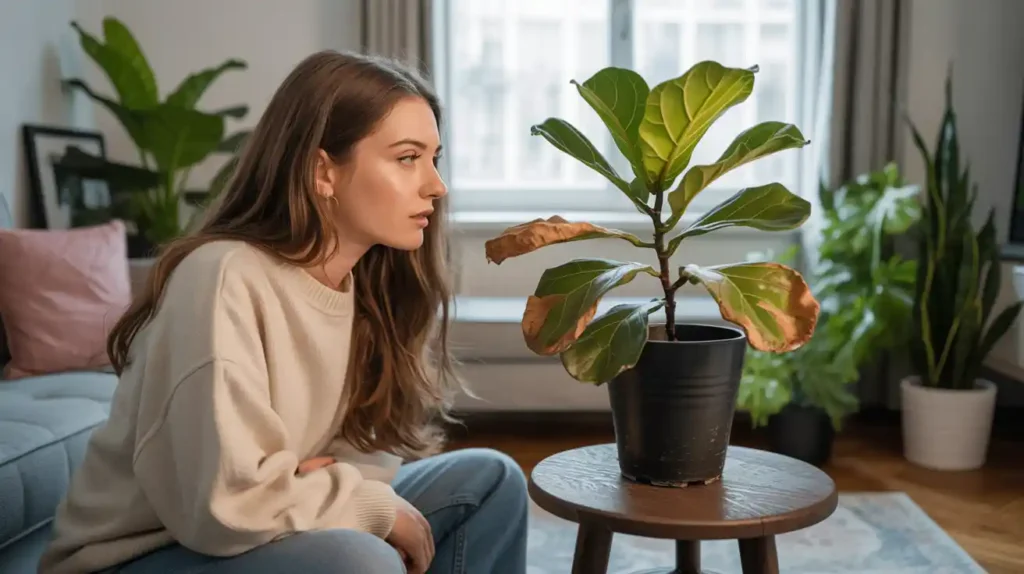
I’ll never forget the day I came home to find my first houseplant, a beautiful fiddle leaf fig I’d been so proud of, with crispy brown edges and drooping leaves that looked like they were waving goodbye.
I’d been so excited to become a “plant parent,” but clearly, I had no idea what I was doing!
After killing that poor plant (and honestly, a few others), I realized that most of us make the same handful of mistakes when we’re starting.
The good news?
These mistakes are totally fixable, and once you know what to look for, keeping plants happy becomes so much easier.
Whether you’re just bringing home your first snake plant or you’ve been struggling to keep anything green alive, this guide will walk you through the most common plant care mistakes and, more importantly, how to avoid them.
Trust me, your future plant babies will thank you!
What Are the Most Common Plant Care Mistakes?
After years of trial and error (emphasis on the error!), I’ve noticed that most beginner plant parents tend to stumble over the same seven issues.
These aren’t complicated problems—they’re usually just misunderstandings about what plants need.
Picture it like learning to drive: once someone shows you how to check your mirrors and use your turn signals properly, everything clicks into place.
The mistakes we’ll cover are:
- Overwatering (the #1 plant killer!)
- Using the wrong type of soil
- Ignoring light requirements
- Forgetting about humidity
- Skipping the drainage game
- Over-fertilizing or under-fertilizing
- Not checking for pests regularly
Why Do These Mistakes Happen So Often?
Here’s the thing: most of these mistakes come from a place of love!
We want to take care of our plants so badly that we end up overdoing it. It’s like that friend who hovers too much when you’re sick (we’ve all been there).
Plants, believe it or not, are pretty independent once you understand their basic needs.
Many of us also come into plant parenthood with assumptions from other types of caregiving.
We think, “If my pet needs water every day, surely my plant does too!” But plants operate on completely different timelines and have totally different needs.
How to Identify and Fix Each Common Mistake
1. The Overwatering Trap
What it looks like: Yellow leaves, mushy stems, a funky smell coming from the soil, or leaves that feel soft and squishy to the touch.
Why it happens: This is usually our first instinct—water equals life, right?
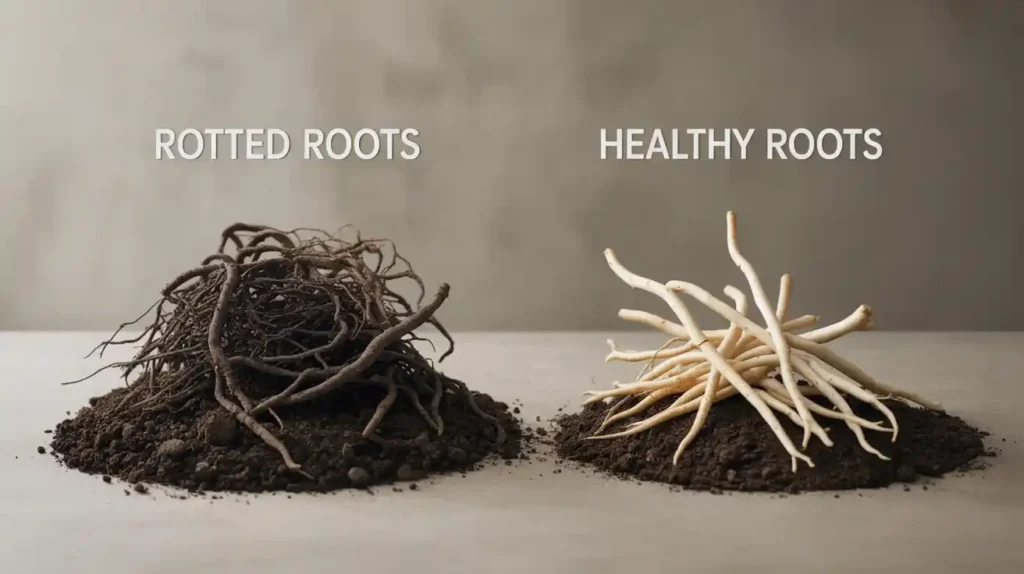
But too much water actually drowns the roots and creates the perfect environment for root rot (basically plant pneumonia).
How to fix it:
- Stop watering immediately
- Check if the soil feels soggy by sticking your finger about 1-2 inches down
- If it’s waterlogged, gently remove the plant from its pot
- Trim away any black, mushy roots with clean scissors
- Repot in fresh, well-draining soil
- Wait until the top inch of soil is dry before watering again
My rule of thumb: Most houseplants prefer to dry out slightly between waterings. Think of it like a sponge—you want it damp, not dripping wet.
2. Wrong Soil, Wrong Results
What it looks like: Water that sits on top of the soil forever, plants that seem stunted, or soil that stays wet for days and days.
Why it happens: That regular potting soil from the garden center might seem fine, but many plants need specific drainage or pH levels to thrive.
How to fix it:
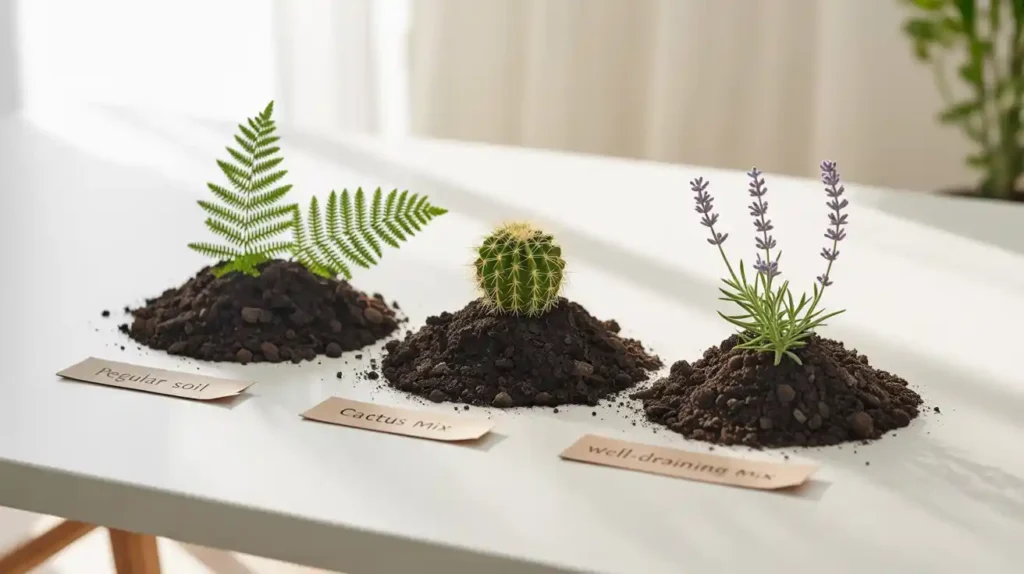
- Research your specific plant’s soil needs (succulents need sandy, well-draining soil; tropical plants often prefer slightly acidic, moisture-retaining mixes)
- Look for specialty potting mixes at your local nursery
- If you prefer DIY, you can mix regular potting soil with perlite (those white chunky bits) for better drainage
- Repot during the growing season (spring/summer) when plants recover faster
Pro tip: I always keep a bag of perlite around because you can add it to almost any potting mix to improve drainage. It’s like insurance for your plant’s roots!
3. Light—It’s Not Just About “Bright” or “Dark”
What it looks like: Leggy, stretched-out growth reaching toward windows, pale or yellowing leaves, or plants that just seem to stop growing altogether.
Why it happens: Plant tags often say things like “bright, indirect light,” but what does that actually mean? (I spent months wondering this myself!)
How to understand light requirements:
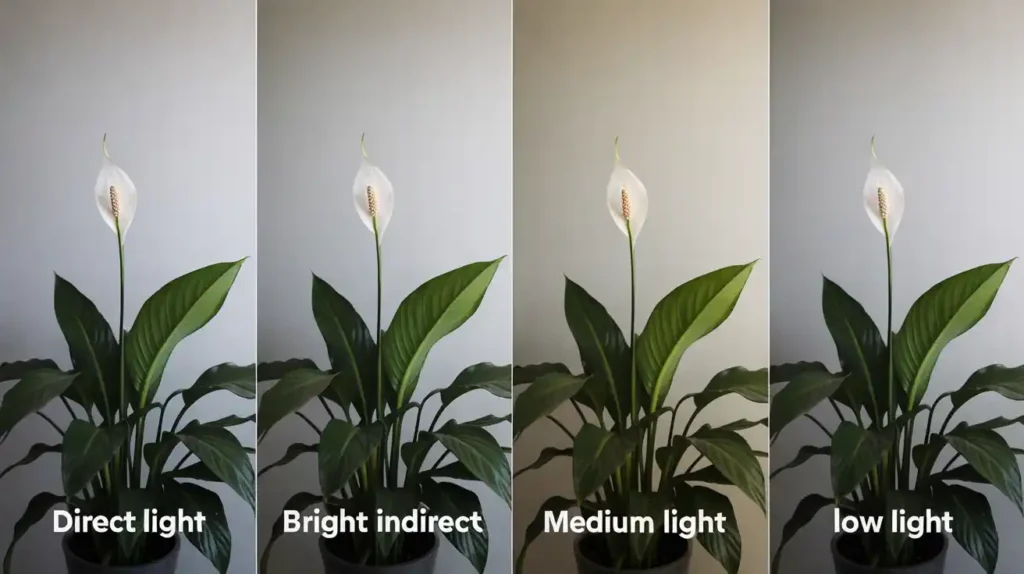
- Bright, direct light: Right in a south-facing window where the sun hits the leaves directly
- Bright, indirect light: Near a window but not in the direct sun path—think a few feet back from an east or west window
- Medium light: Further from windows, north-facing windows, or areas that get gentle morning sun
- Low light: Those corners that get ambient light but no direct sun
How to fix it:
- Observe your space throughout the day—where does the sun actually hit?
- Move plants closer to or further from windows based on their needs
- If you’re in a low-light situation, consider a grow light (they make stylish ones now that don’t look like laboratory equipment!)
- Rotate plants weekly so all sides get equal light
4. Humidity—The Invisible Need
What it looks like: Brown, crispy leaf edges, leaves that curl up, or plants that look generally sad despite proper watering and light.
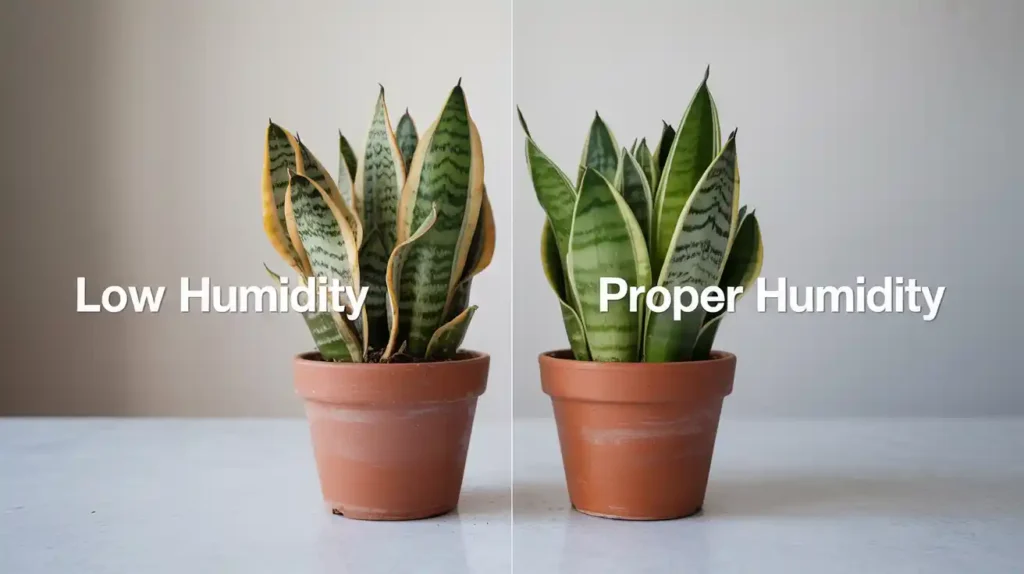
Why it happens: Most houseplants are tropical natives used to much higher humidity than our homes provide (especially during winter when heating systems dry everything out).
How to boost humidity:
- Pebble tray method: Place a shallow dish filled with water and pebbles under your plant pot
- Grouping plants: Plants naturally release moisture, so clustering them creates a little microclimate
- Humidifier: The easiest solution if you have multiple plants (I run mine during dry winter months)
- Bathroom placement: If your plant tolerates lower light, bathrooms naturally have higher humidity
Quick test: If your home’s humidity is below 40% (you can get a cheap hygrometer to check), your tropical plants will probably appreciate a humidity boost.
5. Drainage—Your Plant’s Best Friend
What it looks like: Water pooling at the bottom of decorative pots, roots that look black and mushy, or plants in pots without holes in the bottom.
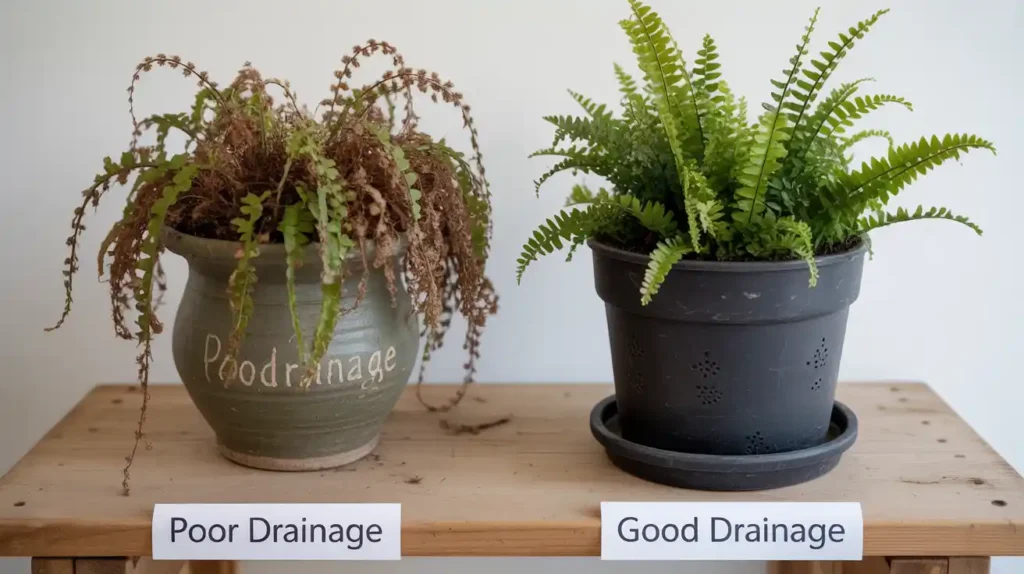
Why it’s crucial: Without proper drainage, water has nowhere to go, and roots literally drown. It’s like wearing rain boots in a swimming pool—not going to end well!
How to ensure proper drainage:
- Always use pots with drainage holes (non-negotiable, in my opinion)
- If you love a decorative pot without holes: Use it as a cache pot—put your plant in a plastic pot with holes, then place that inside the pretty pot
- Add a layer of pebbles or broken pottery at the bottom of pots for extra drainage
- Empty saucers: Don’t let plants sit in standing water for more than 30 minutes after watering
6. The Fertilizer Confusion
What it looks like: Either no growth at all, or crazy fast growth with weak, pale stems that fall over easily.
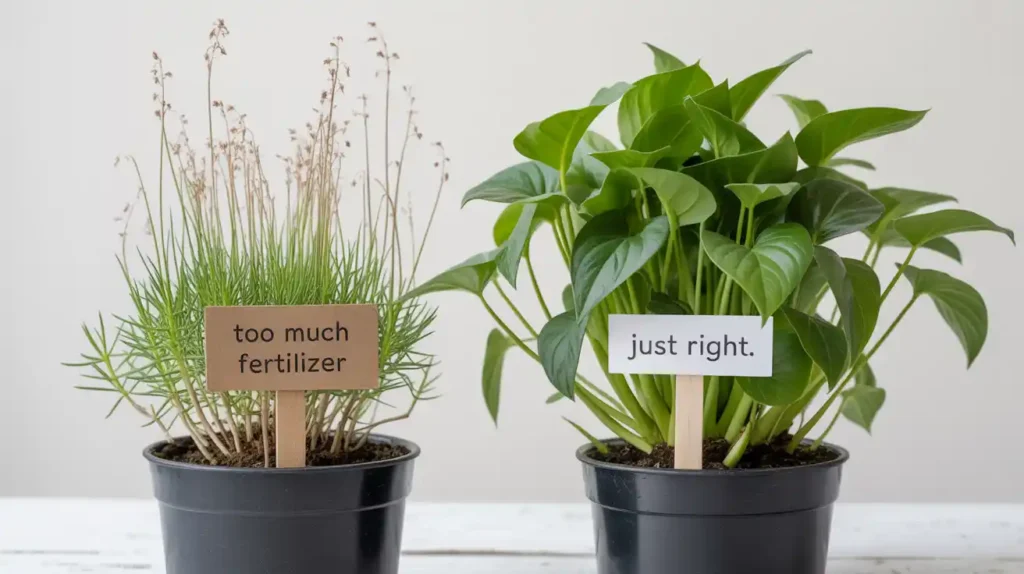
Why it’s tricky: Plants need nutrients, but too little or too much can cause problems. Think of it like vitamins—good in moderation, harmful in excess.
How to fertilize properly:
- During growing season (spring/summer): Most plants appreciate monthly feeding with a balanced, diluted fertilizer
- During dormancy (fall/winter): Skip fertilizing—plants aren’t actively growing and can’t process the nutrients
- Dilute to half strength: Most fertilizers are stronger than plants actually need
- Watch for signs: If leaves are pale green or growth is slow during the growing season, they might need nutrients
My lazy-person hack: I use diluted liquid fertilizer every other watering during spring and summer, then stop completely in fall. Works like a charm!
7. Pest Prevention—Easier Than Treatment
What it looks like: Tiny webs, small flying bugs, sticky substances on leaves, or tiny moving dots on the undersides of leaves.
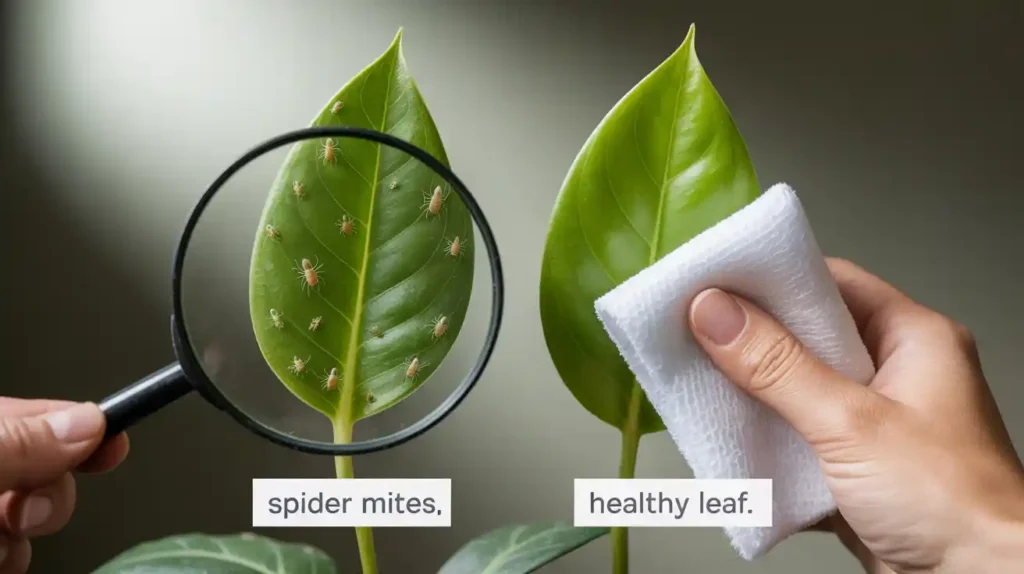
Why pests happen: They’re often introduced on new plants or through open windows, and they love stressed plants (kind of like how we get sick when we’re run down).
How to prevent and treat:
- Quarantine new plants for 1-2 weeks in a separate area
- Regular inspection: Make it part of your weekly plant check—look under leaves and along stems
- Wipe leaves monthly with a damp cloth (plants love this, and it removes dust and potential pests)
- If you spot pests: Isolate the plant immediately and treat with insecticidal soap or neem oil
Early intervention tip: I keep a spray bottle with diluted dish soap handy. At the first sign of bugs, I give affected plants a gentle shower and soap treatment. Much easier than dealing with a full infestation!
Tips for Success: Building Good Plant Parent Habits
Here’s what I wish someone had told me when I started:
Create a simple routine: I check my plants every Sunday morning with my coffee. It’s become this lovely ritual where I water whoever needs it, wipe down leaves, and just enjoy my green friends.
Keep a plant journal: Nothing fancy—just notes on when you water, any changes you notice, or problems that pop up. Your phone’s notes app works perfectly for this.
Start with forgiving plants: Snake plants, pothos, and ZZ plants are nearly indestructible and perfect for building confidence.
Join plant communities: Online groups (especially Pinterest boards dedicated to houseplants!) are incredible resources for troubleshooting and inspiration.
Embrace the learning curve: Every plant parent kills a few plants while learning. It’s like a rite of passage! Don’t let it discourage you.
Seasonal Considerations: Adjusting Your Care
Here in most temperate regions, our plants have different needs throughout the year:
Spring/Summer (Growing Season):
- Water more frequently as plants actively grow
- Fertilize monthly
- This is the best time for repotting or propagating
- Gradually introduce plants to outdoor spaces if you want to give them a summer vacation
Fall/Winter (Dormancy Period):
- Reduce watering frequency
- Stop fertilizing
- Watch for lower humidity due to heating systems
- Don’t be alarmed if growth slows or stops—it’s natural!
Pro tip: I move my humidity-loving plants closer to each other during winter and run a small humidifier nearby. It creates this cozy plant corner that we all benefit from during dry months.
Your Plant Care Journey Starts Now
The beautiful thing about plant care is that it’s incredibly forgiving once you understand these basics.
Yes, you might lose a plant or two while you’re learning (I certainly did!), but each experience teaches you something valuable about what these green friends actually need.
Remember, the goal isn’t perfection, it’s progress.
Your plants don’t need you to be an expert; they just need you to pay attention and adjust as you learn.
Start with one or two easy plants, implement these guidelines, and watch as your confidence grows along with your green family.
The rewards are so worth it: cleaner air, a more beautiful home, the satisfaction of nurturing something living, and the pure joy of seeing new growth appear.
Plus, there’s something magical about having thriving plants around—they make any space feel more alive and welcoming.
So grab that plant you’ve been eyeing, armed with your new knowledge, and dive in! Your plant parent journey is going to be amazing, and I’m rooting for you (pun absolutely intended).
Happy planting! 🌱