DIY Air Stone Hydroponic: Boosting Oxygen for Plants
 These bubbles increase oxygen levels while also providing circulation and preventing stagnation, so plants can absorb nutrients more efficiently. Plus, you can experiment with different sizes and shapes of containers, types of nutrients, and other oxygenation sources.
Research by Cornell University has even shown that adding an air stone to hydroponic systems significantly boosts plant growth! So, create your own DIY Air Stone Hydroponic system and enjoy faster plant growth and endless possibilities for cultivating a thriving garden.
Benefits of a DIY Air Stone Hydroponic
A DIY Air Stone Hydroponic system offers several benefits:
- Efficient nutrient absorption
- Improved oxygenation
- Customizable and easy maintenance
Moisture levels can be precisely controlled with this system. It also reduces the risk of soil-borne diseases, keeping your plants clean and healthy.
A study from the Journal of Plant Nutrition and Soil Science found that air stone hydroponics lead to higher growth rates than traditional soil cultivation methods.
Time to get creative! Gather your materials and tools – but remember, we can’t provide a handyman hotline if things don’t go as planned!
Materials and Tools Required
DIY Air Stone Hydroponics is like scuba diving for plants! You’ll need a few materials and tools to build your own system.
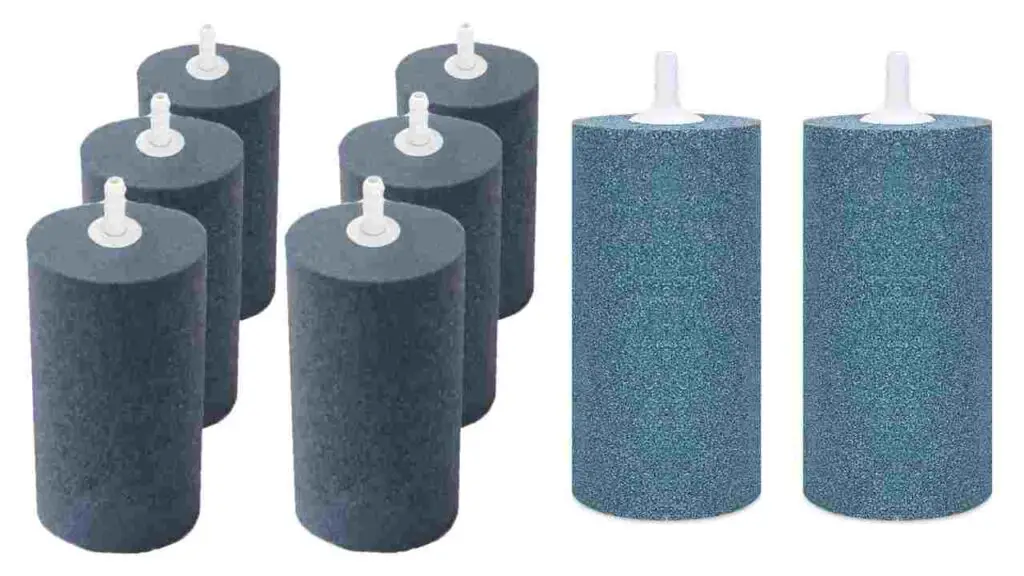
First off, an air pump is essential for oxygenating your plants. An air stone breaks the airflow into small bubbles. Connect the air pump and stone with airline tubing. Also, you’ll need a reservoir tank to mix and store nutrient solution, plus net pots to hold plants securely. A growing medium such as perlite or coconut coir is essential for root support.
Don’t forget a pH testing kit and pH adjustment solutions to maintain the right acidity levels.
Tools? You’ll need a drill with various bits for making holes in the reservoir tank, plus scissors or pruning shears for trimming tubing and transplanting. An adjustable wrench is handy for tightening or loosening fittings. Consider a solar-powered air pump instead of the traditional electrical one – it harnesses solar energy and reduces reliance on electricity.
Hydroponics has been around since ancient times. Modern techniques evolved and incorporated new technologies like air stones. But the principle remains the same – deliver vital nutrients directly to roots in a controlled environment.
Step-by-Step Guide to Building a DIY Air Stone Hydroponic System
Constructing your own air stone hydroponic system is a great way to grow plants without soil. Here’s how to get going:
- Pick a container: Find a suitable watertight container, e.g. a plastic bucket or storage tote, that can hold water and provide space for plant roots.
- Assemble the air stone: Drill holes in the lid of your container for the air tubing and air stone. Attach one end of the air tubing to an air pump, the other to the air stone. Put the air stone in the bottom of the container.
- Make the nutrient solution: Follow instructions on the hydroponic nutrient solution to mix the correct combination. Fill your container with this solution until it’s one-third full.
- Place net pots: Get net pots or cups to fit in the openings on top of your container. Fill each pot with perlite, coconut coir or expanded clay pellets. Place your seeds or seedlings inside.
- Monitor water and oxygen: Track the water level and replenish as needed. Make sure your air pump runs continuously to give your plants enough oxygen.
Suitable plants for hydroponics include lettuce, spinach, herbs, and small vegetables like cherry tomatoes. To encourage healthy growth, adjust pH levels and use water-soluble fertilizers with your regular nutrient solution feedings.
To sum it up, building a DIY air stone hydroponic system is doable and effective. Following these steps and using the tips will help you create a thriving hydroponic setup and enjoy flourishing plant growth. Remember to give your system regular TLC or your plants will wilt faster than a bad hair day!
Maintenance and Troubleshooting Tips
For top-notch performance, proper maintenance of your DIY air stone hydroponic system is a must. Here are some essential tips to remember:
- Clean regularly with a soft brush or sponge to avoid clogging or mineral buildup.
- Check the airflow from the air pump often. Replace any clogged or damaged air tubes right away.
- Monitor the water level – not too high, not too low. This will prevent root rot and ensure optimal plant growth.
- Test the pH level every now and then using a reliable kit. Aim for a slightly acidic range between 5.5 and 6.5.
- Change your nutrient solution every two weeks for balanced nutrition.
- Keep tabs on your plants. Address any wilting, yellowing leaves, or pest infestations immediately.
To really take your DIY air stone hydroponic system to the next level, try these additional tips:
- Minimize light exposure for better root development.
- Add beneficial bacteria supplements for better nutrient absorption.
- Provide adequate ventilation for CO2 exchange.
- Inspect and tighten all connections to avoid air leaks.
- Optimize the distance between the air stone and the plant roots.
- Use a water chiller or insulate your nutrient solution in hot climates.
By following these steps, you can ensure that your DIY air stone hydroponic system runs optimally. Cleaning and monitoring regularly will prevent issues and implementing extra suggestions will maximize plant health and growth. Get ready to start gardening!
Recommended Plants for a DIY Air Stone Hydroponic System
Plants are perfect for hydroponics—they require minimal soil and love water-based environments. Here are some of the best choices:
- Lettuce, with its shallow roots
- Herbs like basil, mint, and parsley
- Juicy strawberries
- Tomatoes
- Peppers
- and spinach
You can also experiment with other leafy greens or even flowers like marigolds or pansies. Keep in mind the plants’ nutritional needs, growth habits, and compatibility with the hydroponic environment.
Now, let me tell you about John. He had a small balcony, but he transformed it into a flourishing hydroponic garden! He grew lettuce, herbs, and tomatoes with impressive harvests. His success inspired others to take up hydroponics. So say goodbye to soil and hello to DIY Air Stone Hydroponics!
Conclusion:
Air stone hydroponics are a great way to enjoy DIY gardening. Air stones can enhance root growth, oxygen levels, and nutrient absorption for plants. Here are four key advantages of DIY air stone hydroponic systems:
- Enhanced Oxygenation: Air stones infuse water with oxygen, giving plant roots a great supply. This increases root health and prevents issues like root rot.
- Efficient Nutrient Delivery: Nutrients are delivered directly to the roots in a highly efficient manner. This helps plants get the amount of nutrients they need for growth.
- Increased Plant Productivity: Plants in aerated water grow and produce more yields than those in soil.
- Water Conservation: DIY air stone hydroponics reduce water consumption. This minimizes wastage and is more sustainable.
Plus, they are versatile and compatible with various plants and sizes. Emma, a novice gardener, tried it to grow herbs. She was amazed at how quickly her plants flourished and yielded flavorful foliage. It required minimal effort and maintenance – this is the ease and joy of cultivating thriving herbs right in the kitchen.
