General Hydroponics Autoflower Feeding Schedule (DWC)

The GH Flora Trio was designed for photoperiod plants, and the default feeding chart shows it. Those ratios assume weeks of vegetative growth you can adjust on the fly. Autoflowers don’t give you that flexibility. They run on a fixed internal clock, and if you’re still pushing heavy nitrogen into week 5 because the standard chart says so, you’re already behind.
This is a week-by-week general hydroponics autoflower feeding schedule built specifically for autos in DWC, with notes for coco and clay pebbles where the approach differs. Every stage has the FloraMicro, FloraGro, and FloraBloom ratios, target PPM, EC, and pH window laid out in one table you can actually use at the reservoir.
The Flora Trio at a Glance (and Why Autos Need Their Own Chart)
The GH Flora Series uses three bottles: FloraMicro (nitrogen and micronutrients), FloraGro (nitrogen and potassium for structural growth), and FloraBloom (phosphorus and potassium for flower production). The ratios between them shift based on what the plant needs at each stage.
Standard photoperiod charts hold plants in a heavy-Gro, low-Bloom phase for 4 to 8 weeks, then flip. Autoflowers start flowering at 3 to 4 weeks old regardless of light schedule, which means you need to start transitioning nutrients before most charts would suggest it.
The practical rule: match your ratios to what the plant is doing, not what week number a generic chart says. By week 4 on a fast auto, you may already need to start pulling Gro down and pushing Bloom up, even if the plant looks like it’s still in veg.
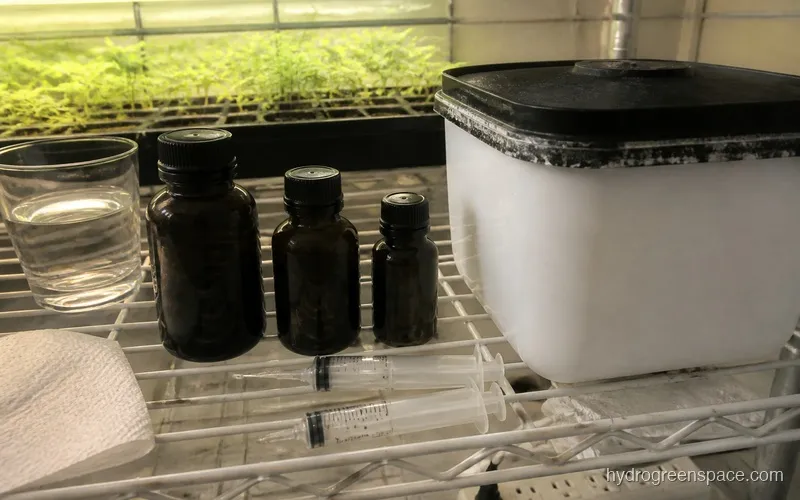
Tip: Always mix FloraMicro into your water first, before FloraGro or FloraBloom. Mixing Bloom and Micro together directly causes a chemical reaction that locks out calcium. Micro first, every time.
Week-by-Week Feeding Table
This schedule covers a typical 10 to 12 week autoflower run in DWC. PPM is measured with a 500 scale (EC × 500). If your meter uses the 700 scale, multiply EC by 700.
| Week | Stage | FloraGro (ml/gal) | FloraMicro (ml/gal) | FloraBloom (ml/gal) | Target PPM (500 scale) | EC (mS/cm) | pH Window |
|---|---|---|---|---|---|---|---|
| 1 | Seedling | 0.5 | 0.5 | 0.5 | 200–300 | 0.4–0.6 | 5.8–6.0 |
| 2 | Early Veg | 2 | 1 | 1 | 400–500 | 0.8–1.0 | 5.8–6.0 |
| 3 | Veg | 3 | 2 | 1 | 600–700 | 1.2–1.4 | 5.8–6.0 |
| 4 | Pre-Flower | 2 | 2 | 2 | 700–800 | 1.4–1.6 | 5.8–6.0 |
| 5 | Early Flower | 1 | 2 | 3 | 800–900 | 1.6–1.8 | 5.8–6.0 |
| 6 | Flower | 1 | 2 | 3 | 900–1000 | 1.8–2.0 | 5.8–6.0 |
| 7 | Flower Peak | 0.5 | 2 | 4 | 1000–1100 | 2.0–2.2 | 5.8–6.0 |
| 8 | Late Flower | 0.5 | 1.5 | 4 | 900–1000 | 1.8–2.0 | 5.8–6.0 |
| 9 | Ripening | 0 | 1 | 3 | 700–800 | 1.4–1.6 | 5.8–6.0 |
| 10 | Pre-Flush | 0 | 0.5 | 2 | 400–500 | 0.8–1.0 | 5.8–6.0 |
| 11–12 | Flush | 0 | 0 | 0 | < 100 | < 0.2 | 6.0 |
Warning: These are starting points, not fixed rules. An auto running at 1,100 PPM in week 7 with dark green, slightly clawed leaves is telling you to back off. Read the plant first, use the table second.
Breaking Down Each Stage
Seedling (Week 1)
Start extremely light. Seedlings in DWC have fragile root systems and don’t need much at all. If you’re starting in a rapid rooter or rockwool cube above a reservoir, hold off on any nutrients until roots have breached into the water, then add the seedling dose. Pushing 600 PPM at this stage is how you burn a plant before it even gets started.
Vegetative (Weeks 2–3)
This is where the plant builds its structure: stems, nodes, root mass. FloraGro does most of the heavy lifting here with its nitrogen and potassium profile. Keep pH between 5.8 and 6.0 in DWC for best nitrogen uptake. If you’re growing in clay pebbles (LECA) or coco, you can drift up to 6.2 without issue since those substrates benefit from a slightly higher pH window for calcium absorption.
Understanding how to feed hydroponic plants through each growth stage will make these ratio shifts feel intuitive rather than arbitrary.
Pre-Flower Transition (Week 4)
At week 4, a healthy auto is already forming its first pistils and the plant’s energy is shifting internal resources toward reproduction. Drop FloraGro to match FloraBloom at equal parts and keep FloraMicro steady. Continuing to push 3 ml/gal of Gro here means nitrogen that the plant can’t use, and nitrogen at the wrong time causes lush leafy growth that shades your bud sites.
Early to Peak Flower (Weeks 5–7)
FloraBloom takes over. Phosphorus and potassium drive cell expansion, resin production, and dense bud structure. FloraMicro stays present throughout because the micronutrient package (calcium, magnesium, iron) doesn’t stop being important in flower. Calcium-deficient plants in late flower show it as bud quality drops before you even notice the leaves.
This is the highest-demand period on your nutrient solution. Top off your reservoir with plain pH’d water between changes, but do full reservoir swaps every 7 days. In DWC, stale solution in the mid-flower range is a root health risk. If you see any slime or smell anything, treat your reservoir immediately.
For reference on how PPM targets map across growth stages more broadly, the general hydroponics PPM chart covers the full range with additional context.
Late Flower and Ripening (Weeks 8–9)
Taper everything down. The plant is finishing, not building. Pull FloraGro to near zero, reduce FloraMicro, and let FloraBloom carry the load at lower concentration. You’ll often see lower PPM uptake during this window as the plant’s metabolism slows, so don’t top off with more nutrients to compensate. Top off with plain water.
Flush Week (Weeks 11–12)
Flush at the right time, not on a fixed schedule. The actual trigger is trichome color: mostly cloudy trichomes with 10 to 20% amber means you’re in the window. At that point, drain your reservoir completely and run plain pH’d water (pH 6.0) for 7 to 10 days. You’re not trying to “clean” the plant the way soil growers do. In DWC, the flush removes salt buildup from the root zone and the plant uses up its stored reserves naturally.
Target PPM should drop below 100 by harvest. If you’re above 300 after 7 days of flushing, you had significant salt accumulation in your system and may need to clean your bucket walls and net pot.
What I’d do: On the last 2 to 3 days before chop, I run the reservoir completely dry to a skim level with just enough to reach the roots, and let the water temperature climb slightly toward 72°F to stress the plant lightly. It’s not necessary, but it pushes resin production in those final days.
What to Do When Nutrient Burn Shows Up
Nutrient burn on autoflowers shows as brown, crispy tips on the outer leaves, starting with the fan leaves and moving inward as it worsens. The first sign is usually tips that look burned before the rest of the leaf catches up.
When you see it, drop PPM by 100 to 150 immediately and do a full reservoir change rather than just diluting. Diluting can mask the actual concentration and leave you guessing. A clean reservoir at lower concentration lets you see the plant’s true response within 24 to 48 hours.
The full breakdown of identifying and recovering from nutrient burn in hydroponics covers the full range of burn patterns and recovery timelines, which is worth reading before your first DWC run.
A related problem worth knowing: nutrient lockout in hydroponics looks similar to burn but is caused by pH being off rather than concentration being too high. If lowering PPM doesn’t fix it within 48 hours, check your pH first.
pH Management with the Flora Trio
Keep your reservoir pH between 5.8 and 6.0 for DWC. The Flora Trio is pH-stable when mixed correctly, but pH drifts in DWC as plants uptake different ions at different rates. Check pH daily and expect it to rise as plants absorb acidic ions (like nitrate) faster than others.
If your pH is spiking more than 0.5 points per day, you have an uptake imbalance or a nutrient concentration problem. pH fluctuation in hydroponics is one of the most common causes of deficiencies that look like nutrient issues but aren’t.
For coco growers using the Flora Trio, pH range is 5.8 to 6.2 and you’ll want to run slightly lower EC than the table above to account for coco’s natural buffering of calcium.
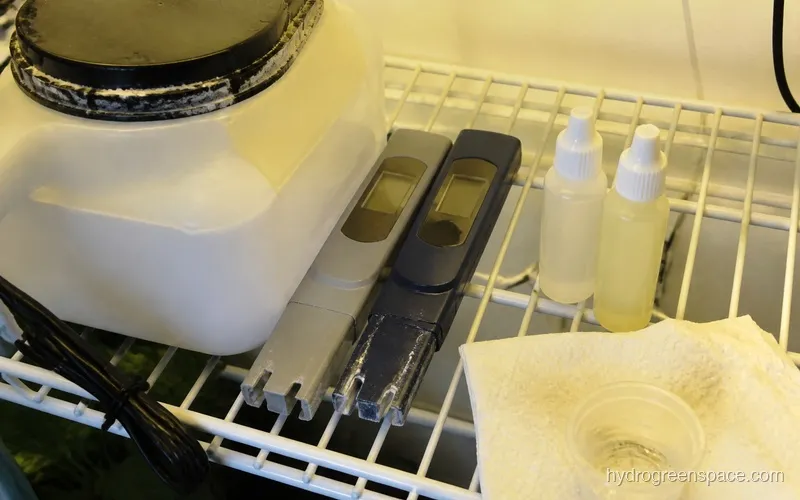
Tracking PPM and EC Across Your Run
The table above gives you targets, but you should also track what you’re actually seeing the plant consume between reservoir changes. If you topped off with a gallon of plain water and the PPM barely moved, the plant is feeding aggressively and can handle the current concentration. If PPM is rising between changes (meaning the plant is drinking water faster than it’s absorbing nutrients), drop your concentration.
For a full reference on reading EC across different crop types and stages, the hydroponic EC chart gives you a broader comparison. And if you want to dial in exact reservoir volumes and ratios without doing math by hand, the hydroponic nutrient calculator does it for you.
One System Note for Coco and Clay Pebbles
DWC is the primary system here because the root zone is always in contact with the solution, which means PPM and EC readings are direct and reliable. In coco or clay pebbles, you’re feeding to runoff, which creates a buffer zone between what you’re pouring in and what the root zone is actually seeing.
For coco: run 10 to 20% runoff at each feed, target EC slightly lower than the table, and check runoff EC to see if salts are accumulating in the substrate. If runoff EC is consistently 10 to 15% higher than your feed EC, you’re building up salts and need to flush the medium.
For clay pebbles (LECA): they don’t hold nutrients the same way coco does, so you can be more aggressive about reservoir changes and have less concern about lockout from salt buildup. The schedule above applies directly. For more on growing in LECA with hydroponic fertilizer, there’s a full breakdown of the specific considerations for clay-based systems.
When to Start Feeding and How to Know It’s Working
In DWC, start nutrients once roots emerge from the net pot into the reservoir, usually 3 to 5 days after germination. Before that, plain pH’d water only.
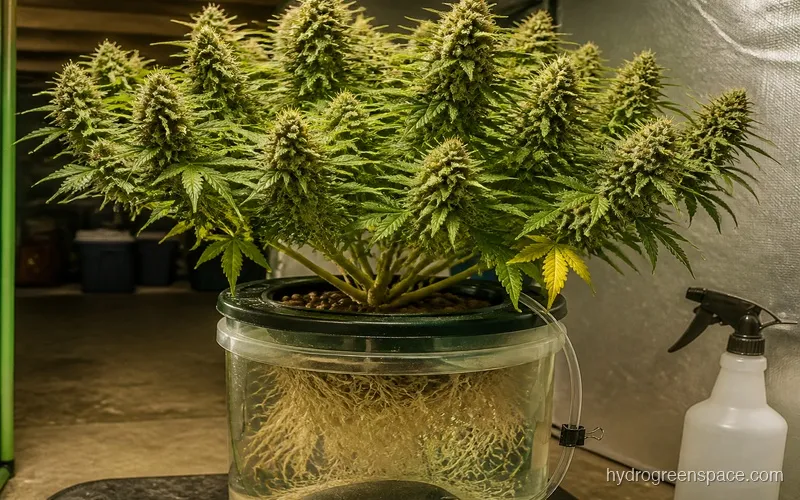
The clearest sign a feeding schedule is working: leaves are medium green (not dark, not pale), tips show no burning, new growth is explosive, and your plant is outpacing your expectations. Autoflowers on a dialed-in nutrient schedule in DWC regularly outperform the same genetics in soil, and that’s the whole point.
Once your autos are harvested and you’ve got the schedule dialed, applying those same principles to leafy greens or vegetables in your system is a natural next step. The best hydroponic nutrients for vegetables covers how those nutrient priorities shift when you’re growing for leaves rather than flowers. And if you want to understand how General Hydroponics fits into the full landscape of nutrient options, the hydroponic nutrients guide breaks down every major approach in one place.