Compost Tea for Hydroponics: Brew, Apply & Avoid Clogs
Growers who’ve heard about compost tea usually arrive with the same question: “Will this clog my system?” It’s the right question to lead with. Compost tea can absolutely block emitters, gum up reservoir lines, and feed a biofilm you didn’t ask for. It can also boost beneficial microorganisms in your root zone, improve nutrient bioavailability, and turn a struggling plant around without reaching for a bottle of synthetic nutrients. Which outcome you get depends almost entirely on how you brew it, how you strain it, and where you apply it.
This is not a topic where one answer covers everyone. A wicking system can tolerate a lot more organic matter than a drip system with 1 mm emitters. A foliar spray sidesteps the reservoir clogging risk altogether. Once you understand the real variables, you can make compost tea work for you or decide it’s more trouble than it’s worth for your setup.
The Clogging Risk Is Real (Here’s What Causes It)
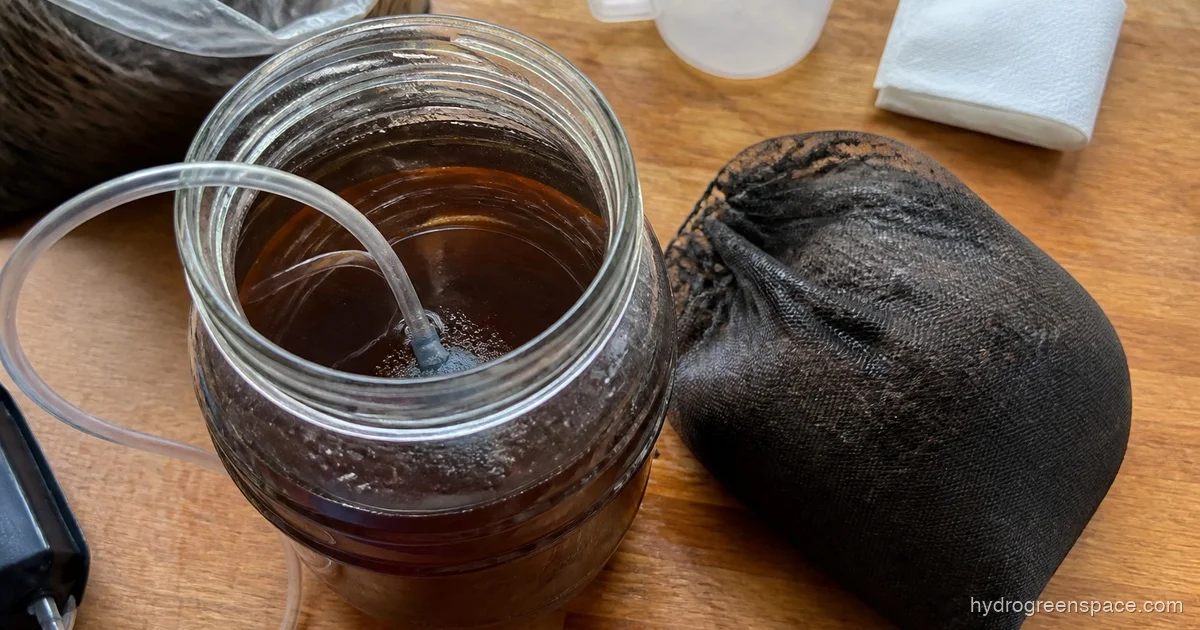
Compost tea is essentially water that has had compost, worm castings, or both steeped and aerated in it for 24 to 48 hours. The aeration encourages beneficial microorganisms (bacteria, fungi, protozoa) to multiply rapidly. That’s the beneficial part. The problem is that compost also contains fine organic particles, fungal hyphae, and suspended solids that do not vanish just because you ran the brew through a mesh bag.
If you pour a poorly strained or over-brewed tea into a recirculating system, those particles accumulate on irrigation lines, net pot collars, and pump screens. In drip systems with precision emitters, partial clogs cause uneven feeding, which then shows up as patchy growth that’s frustratingly hard to diagnose. In NFT channels, the same buildup can restrict flow and create dead spots where cloudy water in the reservoir is only the first sign something is off.
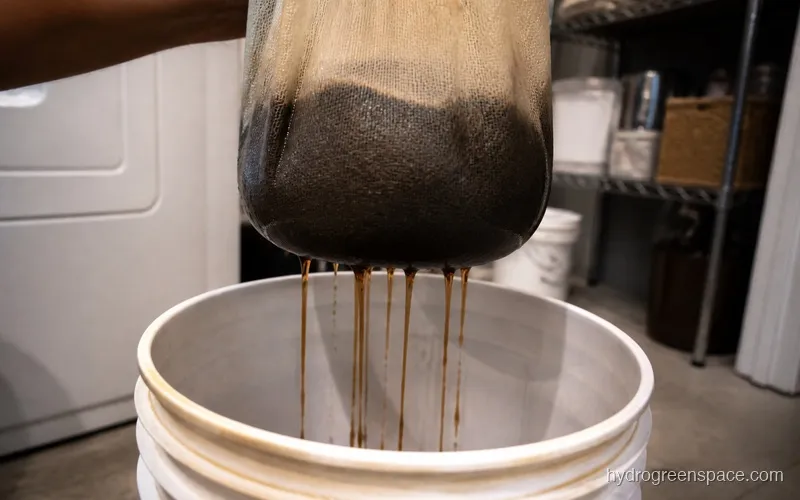
The fix is aggressive straining. Run your finished tea through a 25-micron filter bag, not just a paint strainer. If you’re applying it to a sensitive system, strain it twice. The goal is a liquid that looks dark but runs clear when held up to light.
How to Brew Compost Tea for Hydroponics
The core method is the same whether you’re using finished compost, worm castings, or a mix of both. Worm tea (specifically aerated worm castings tea) tends to be gentler on hydro systems than standard compost tea because worm castings are already well-processed and contain less raw organic matter.
What you need:
- 5-gallon bucket
- Aquarium air pump with air stone and tubing (at least 2 to 4 LPM output)
- 1 to 2 cups of high-quality worm castings or finished compost in a mesh steeping bag
- 1 tsp unsulfured molasses (optional, feeds the microbes)
- Dechlorinated or filtered water, filled to 4 to 5 gallons
Steps:
- Fill the bucket with dechlorinated water. Tap water with chlorine will kill the beneficial microorganisms you’re trying to grow.
- Drop in your steeping bag and air stone. Position the air stone at the bottom center so bubbles agitate the whole column of water.
- Add molasses if you want a more active microbial population. Skip it if you’re concerned about sugars feeding algae in your grow space.
- Brew for 24 to 36 hours at room temperature. You should see foam forming at the top within 12 hours, which is a good sign.
- Stop at 36 hours. Longer brews can tip into anaerobic territory if oxygen can’t keep up, which produces the opposite of what you want.
- Strain thoroughly before any application.
Use the tea within 4 hours of finishing the brew. Beneficial microbial populations crash fast once you stop aerating. A batch of compost tea that sat overnight after brewing has lost most of its biological value.
Foliar Spray vs. Root Drench: Which Is Safer for Hydro?
Foliar application is the lower-risk option for most hydroponic setups. You’re spraying diluted tea directly onto leaves, bypassing the reservoir and irrigation system entirely. This is especially useful early in the grow cycle when you want to establish beneficial microorganisms on leaf surfaces before pests or pathogens move in. Spray in the last hour of your light cycle so the leaves have time to absorb and dry before lights off. Wet leaves sitting in the dark are an invitation for mold.
Mix your strained tea 1:4 with clean water before foliar application. At full strength it can leave mineral deposits on leaves and potentially stress younger plants.
Root zone application (adding tea to your reservoir or watering it in as a root drench) is more effective at actually building the microbial ecosystem your roots live in. But this is where system type determines whether it’s a good idea:
| System Type | Root Zone Application | Notes |
|---|---|---|
| Wicking / passive Kratky | Yes, cautiously | Least risk, no pump or emitters to clog |
| DWC | Low dose only | Strain aggressively; watch for biofilm on air stones |
| Ebb and flow | Yes, with care | Drain fully after each flood cycle |
| NFT | Avoid | Thin film + particle buildup = real clog risk |
| Drip / aeroponic | Avoid | Emitters clog easily; not worth the risk |
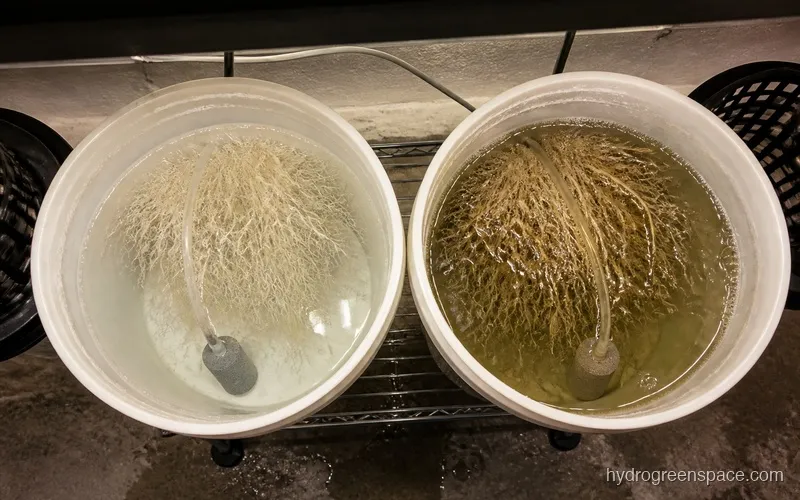
If you’re running a DWC system and want to try root zone application, start with a 10% dilution of your strained tea added to the reservoir. Watch the reservoir for 48 hours before your next addition. Any sign of root rot symptoms or unusual slime on the net pot collars means you need to flush immediately.
pH Considerations You Can’t Ignore
Compost tea typically brews at a pH between 6.5 and 7.5. Your hydroponic reservoir should be sitting between 5.5 and 6.5 for most crops. Adding tea without checking pH first is asking for a nutrient lockout.
Test your brewed tea before it goes anywhere near your system. If it’s reading above 6.5, adjust it down before application, the same way you’d adjust a fresh nutrient mix. Organic inputs interact with pH differently than synthetic nutrients because the microbial activity itself influences pH over time, so expect to recheck your reservoir 12 to 24 hours after any compost tea addition. pH fluctuations in hydroponics are almost always easier to prevent than to correct after the fact.
If you need a refresher on the mechanics, the process for adjusting pH in hydroponic systems is the same whether you’re working with synthetic or organic inputs.
How Often Should You Apply Compost Tea?
Less is more until you understand how your specific system responds.
For foliar application: once a week during early vegetative growth is plenty. Twice weekly if you’re dealing with mild pest pressure and want to reinforce leaf-surface biology.
For root zone application in systems where it’s appropriate: once every two weeks at a low dose. You’re supplementing the microbial environment, not replacing your nutrient solution. Compost tea alone does not supply enough macro or micronutrients to sustain a hydroponic crop. If you’re curious about building a more complete organic nutrient approach, look at making hydroponic nutrients from compost or mixing a DIY nutrient solution at home.
Tip: Run compost tea applications on the same day you do a partial reservoir change. You’re already disturbing the system, so it’s a natural reset point and makes it easier to track how the tea is affecting your water chemistry.
Can Compost Tea Replace Synthetic Nutrients in Hydroponics?
Short answer: no. Longer answer: not yet, and probably not in a home setup without serious complication.
Worm castings tea and compost tea improve nutrient bioavailability, meaning your plants can uptake what’s already in solution more efficiently. But they don’t deliver nitrogen, phosphorus, and potassium in the reliable, measurable concentrations that hydroponic plants need to hit their full growth potential. The moment you drop EC below your target range and try to cover it with organic inputs alone, you’re flying blind.
Running a fully organic hydroponic system is possible, and the question of whether hydroponics can actually be organic is worth understanding before you go that route. For most growers, compost tea works best as a supplement on top of a conventional nutrient schedule, not as a replacement for it.
One more thing: if you’ve noticed algae growth in your hydroponic system, adding molasses-brewed compost tea will make it worse. The sugars that feed beneficial microbes during brewing also feed algae. In algae-prone setups, skip the molasses or skip the tea entirely until you’ve addressed the light leak or other root cause.
What I’d Actually Do
If I were starting with compost tea for the first time in a hydroponics setup, I’d go foliar-only for the first two months. It’s genuinely effective for building disease resistance on leaves, it doesn’t touch the reservoir, and it gives you time to understand how the tea behaves before you introduce it to your root zone.
Once you’re comfortable brewing consistently and straining well, try a single low-dose root zone application in a passive system (Kratky or a simple DWC bucket) and observe for a week. That hands-on experience tells you more than any guide can about how your water chemistry, your microbe population, and your plants interact.
For the full picture of how to feed your plants through the whole growth cycle, how to feed hydroponic plants covers both synthetic and organic approaches in one place. Start there if you want to build a complete feeding strategy that compost tea can support rather than complicate. The hydroponic nutrients guide covers where compost tea sits in the broader spectrum of organic and synthetic nutrient options.